QRcoba - A QR/Barcode Generator and scanner Android App
by: W3 Engineers Ltd.
Email: info@w3engineers.com
At first thank you for purchasing this template. If you have any question or any problem
regarding
this template, feel free to Contact
us via
info@w3engineers.com.
1 - Introduction
QRCoba is built using native Java language in Android Studio. It’s an android QR code scanning application.
It offers more than 9 screens and all are fully designed & functional. QRCoba offers all required features,
which can fulfill any modern application. It’s easy to customize, you can use any format of code like 1D
(Barcode, UPC, CODE_128), 2D (QR code) etc. You can customize any screen as per your need.
It follows the entire standard to fulfill user’s requirements.
2 - Folder Structure
2.1Unzip the file.
2.2You see the following folders:
Customizing the App (contain the android files)
Documentation
3 - Customizing the App
3.1Rename Package.
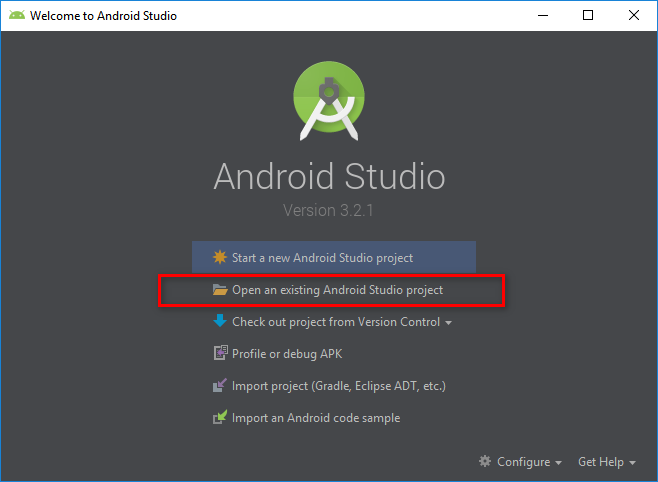
3.1.1Open Android Studio
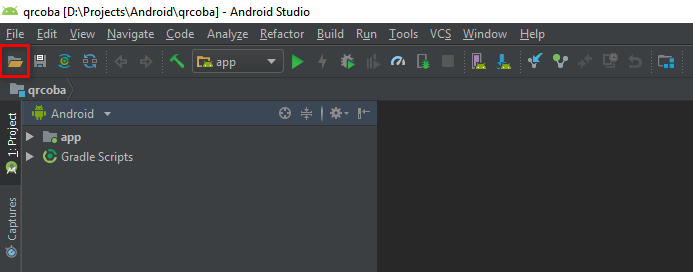
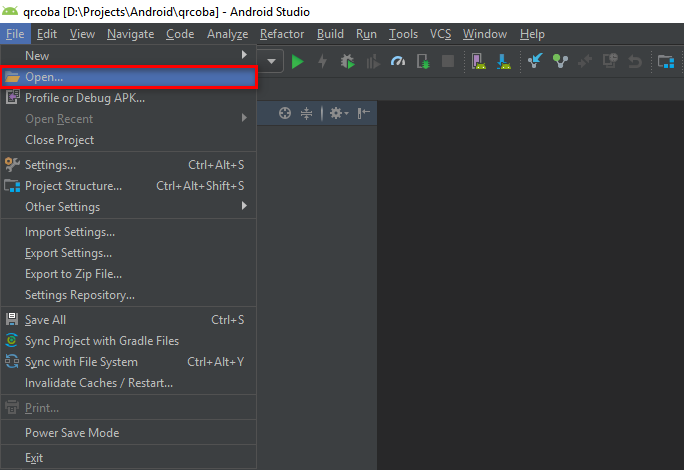
3.1.2Open the project using one of the following methods, (see Figure 1, 2, 3)
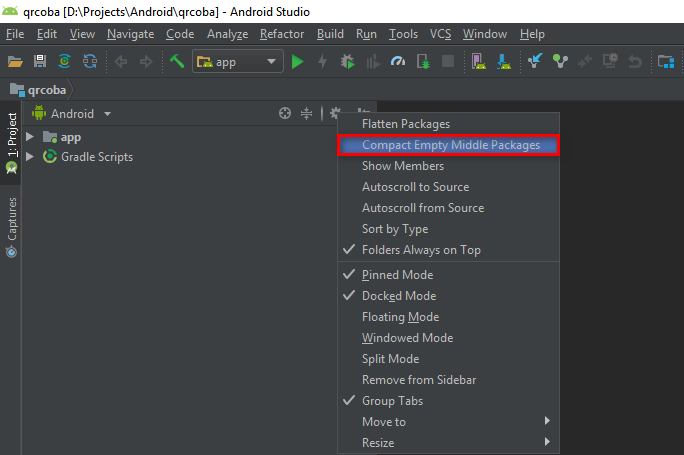
3.1.3In your project pane, click on the little gear icon
3.1.4Uncheck / De-select the Compact Empty Middle Packages option
3.1.5Your package directory will be broken into individual directories now.
Individually select each directory you want to rename
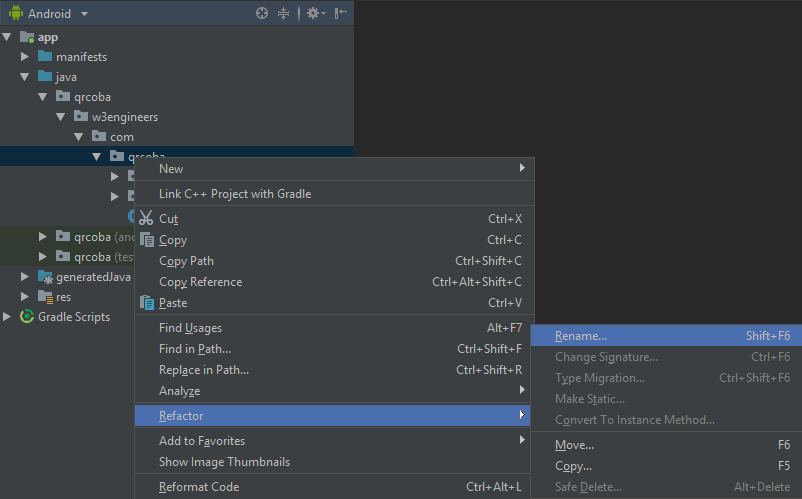
3.1.6Right-click on it
3.1.7Select Refactor
3.1.8Click on Rename
3.1.9In the Pop-up dialog, click on Rename Package
3.1.10Enter the new name and hit Refactor
3.1.11Click Do Refactor at the bottom and allow a minute to let Android Studio update all changes
3.1.12Note: While renaming com in Android Studio, it might give you a warning.
In such case, select Rename All.
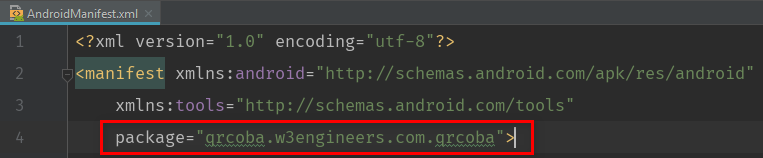
3.1.13Open your AndroidManifest.xml file. Change the package to your
new package name under the manifest tag.
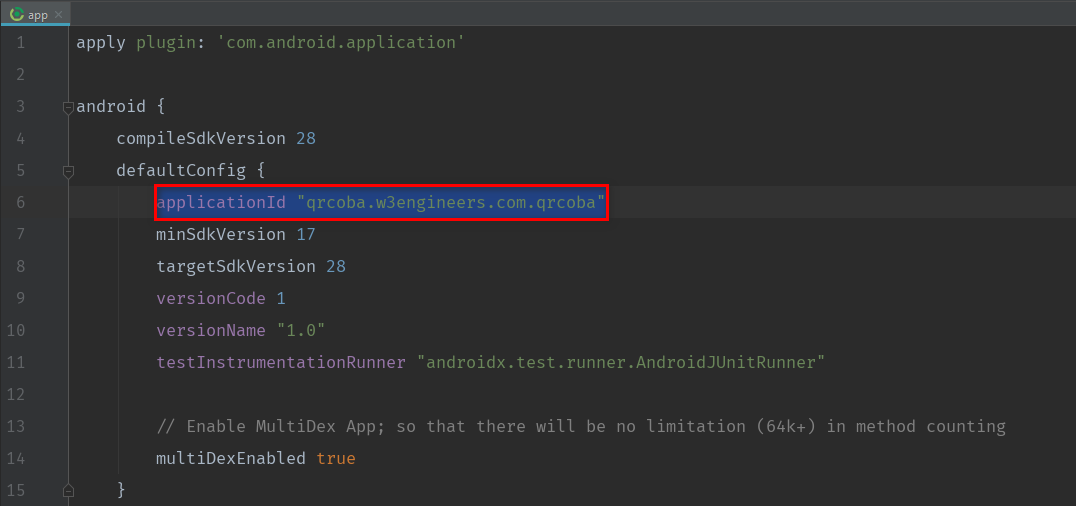
3.1.14Now open your build.gradle (app) file. Update the applicationId to
your new package name and sync gradle.
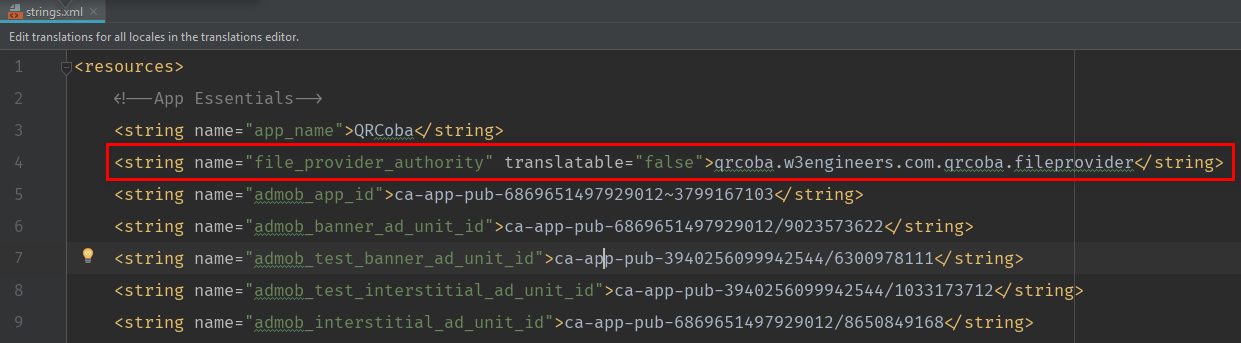
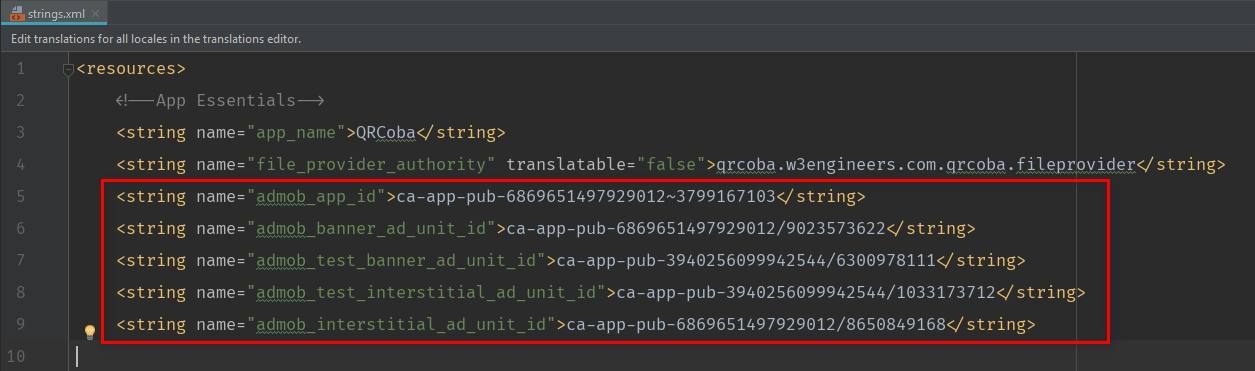
3.1.15Open values-> strings.xml file.
3.1.16Rename the item file_provider_authority similar to your new package name
3.1.17Clean and rebuild
3.1.18Done
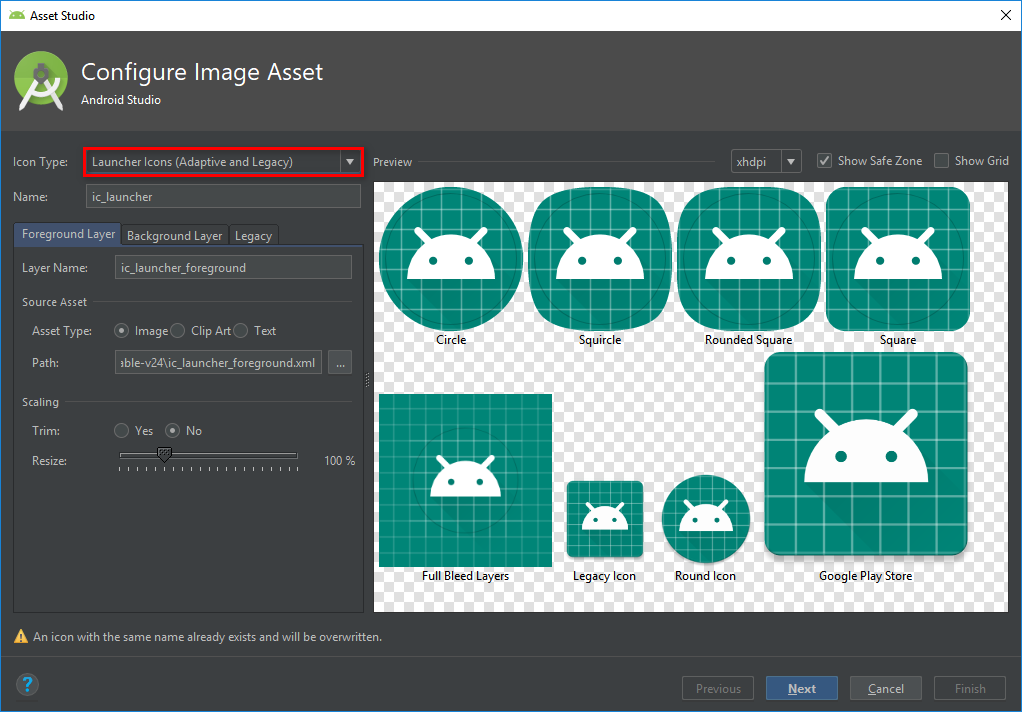
3.2Change App Logo
3.2.1Right-click on the res folder.
3.2.2Click on the New, then Image Asset.
3.2.3Select Launcher IconsIcons (Adaptive and Legacy) and
set Foreground Layer, Background Layer.
3.2.4Click on Next
3.2.5Click on Finish. Done.
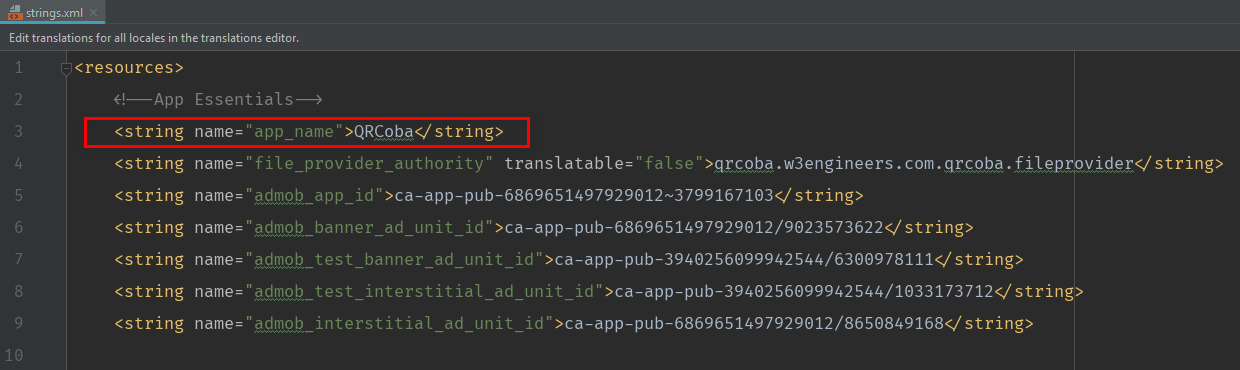
6.3Change App Name.
3.3.1To change Application name go to the values > strings.xml file
3.3.2Change the app_name item.
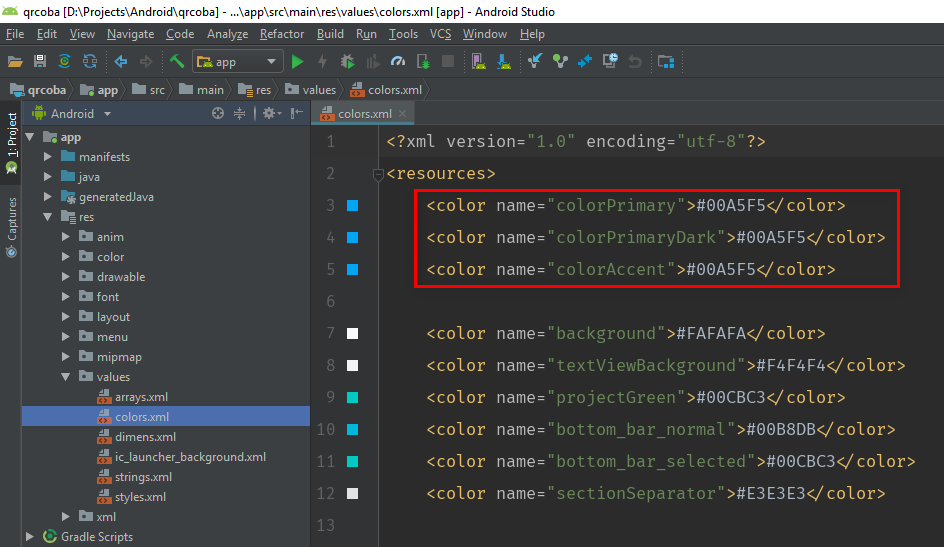
3.4Change App Color.
3.4.1Go to the values > colors.xml file
3.4.2Change the colorPrimary, colorPrimaryDark, colorAccent item values
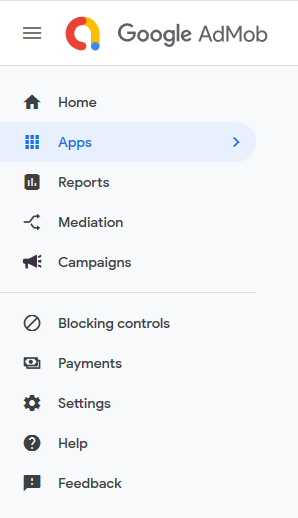
4 - Add Admob
Note : Real admob adds will be shown only after the publication into the google play store.
4.1Login with your Gmail account
4.2Go to this
link
4.3From Apps option create App
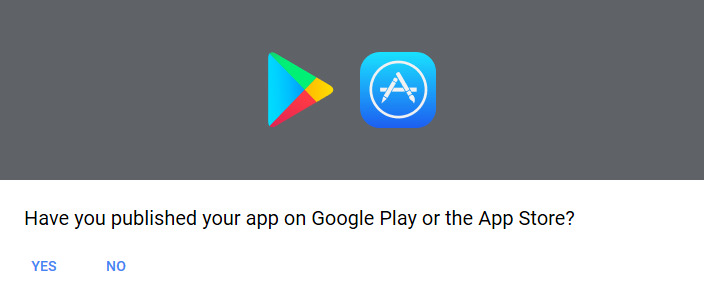
4.4If your app is in play store then select
YES otherwise NO
4.5Then provide app information and click ADD
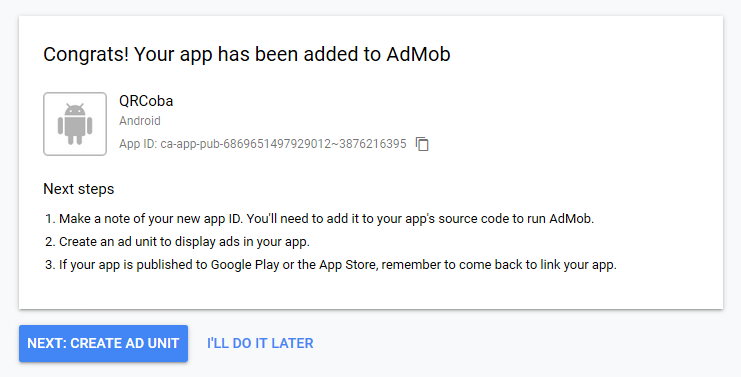
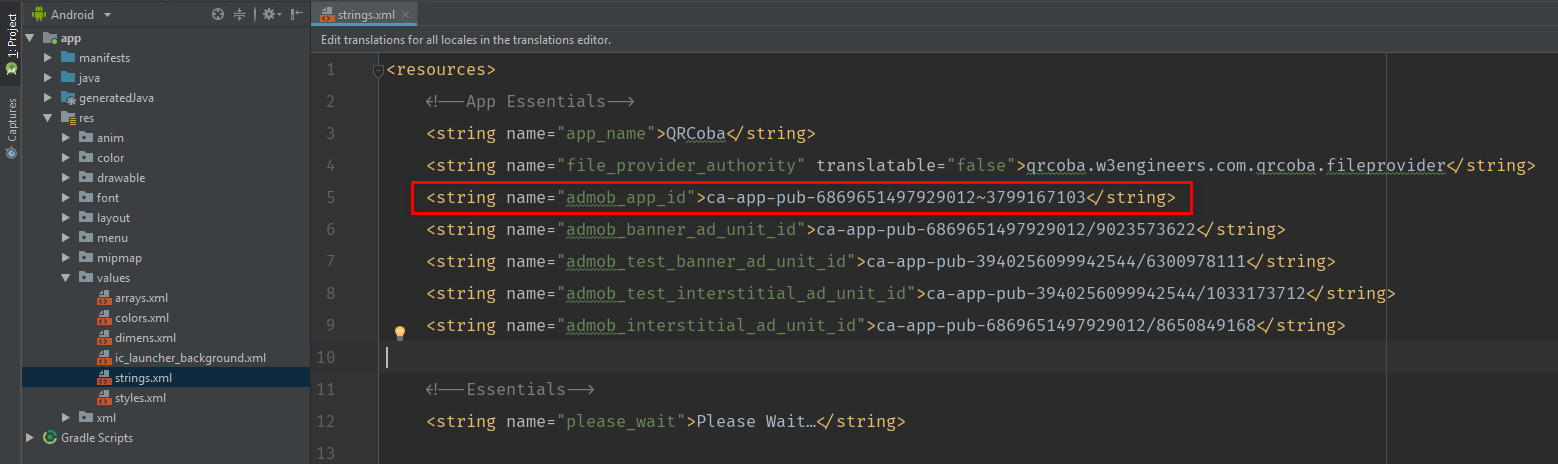
4.6Then you will get an App ID.
Save it at values > string.xml file. You will need it later.
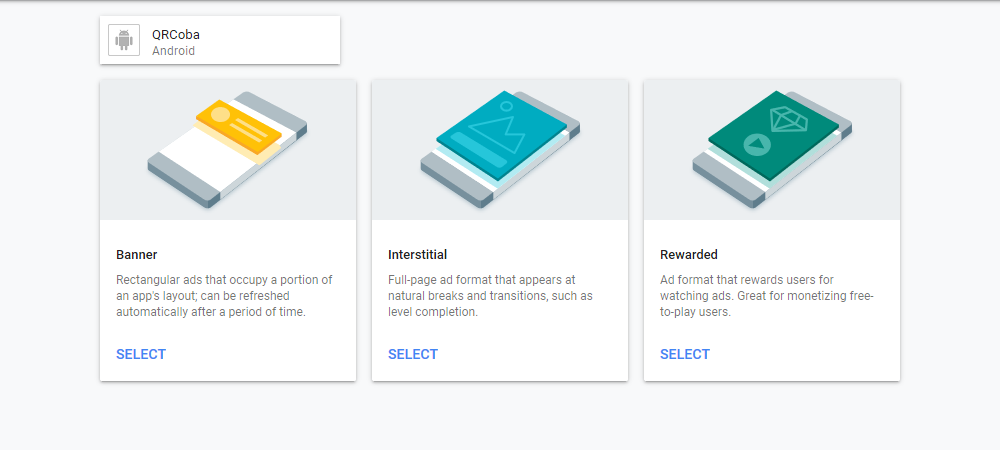
4.7Then click on CREATE AD UNIT and you will find three ad types.
Only Banner and Interstitial types will be used here.
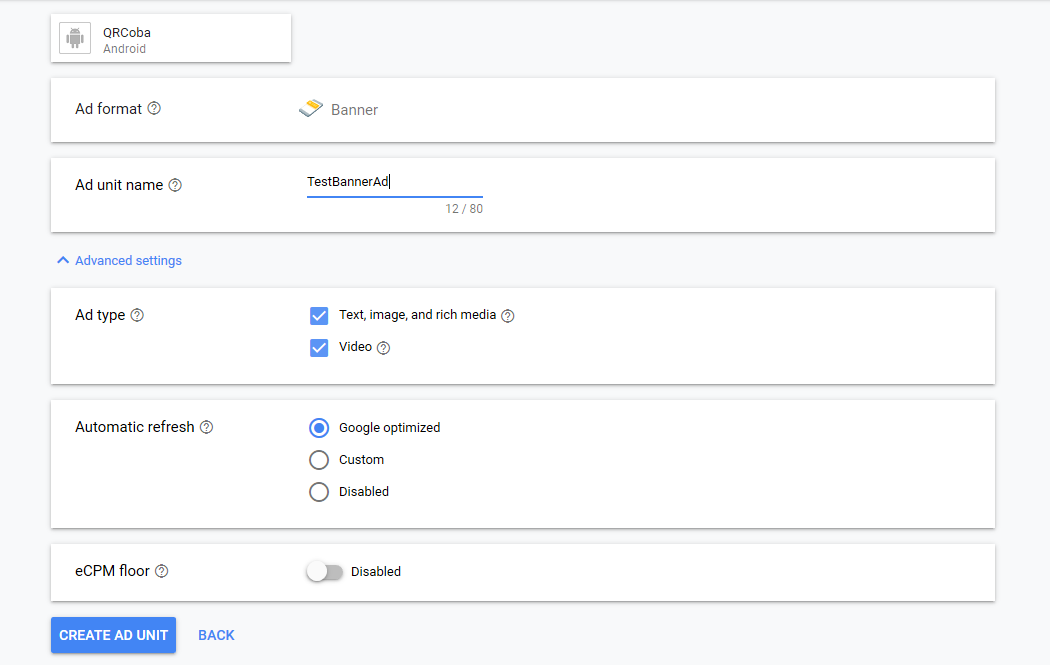
4.8Select Banner type.
Provide Ad unit name and click on CREATE AD UNIT.
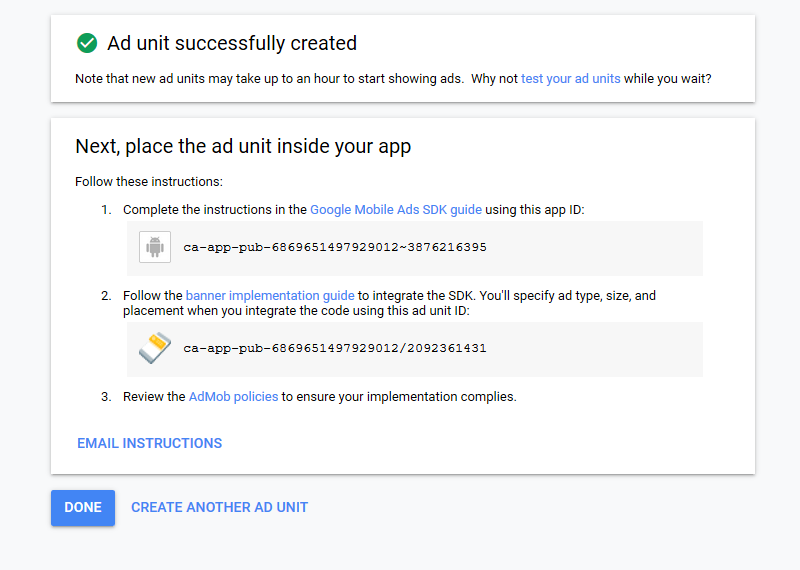
4.9Copy Banner Ad unit id and save it .You will need it later.
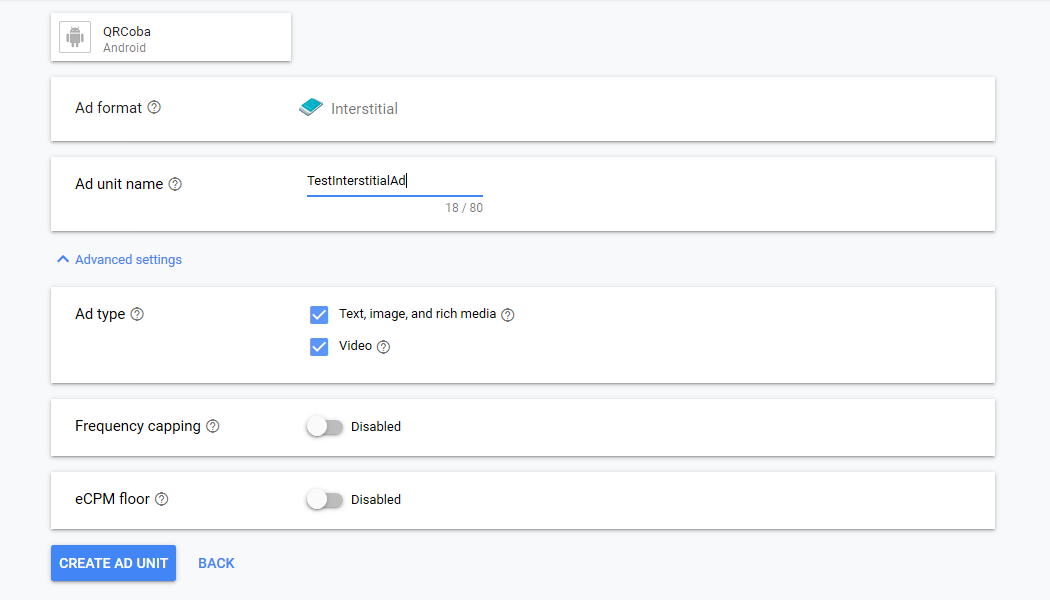
4.10Then again go back to Ad types and select Interstitial Ad type.
Provide Ad unit name and select CREATE AD UNIT.
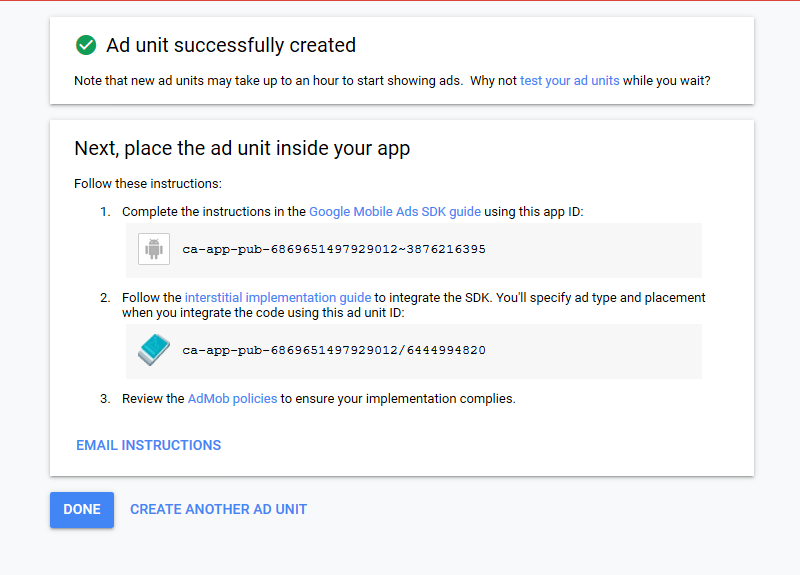
4.11Copy the Interstitial ad unit id and
save it. You will need it later.
4.12Now get saved Admob Banner and
Interstitial Ad unit id.
Then go to res > values > strings.xml file in Android Studio.
Put them to admob_test_banner_ad_unit_id, admob_test_interstitial_ad_unit_id items.